Monday, August 25, 2014

DIY: Beaded Necklace


My wardrobe consists of three colors: white, black and grey (sometimes navy) so I am in some major need of color.  Being shy to color like I am, the best way to add a pop is with some jewelry.  Since I am cheap and enjoy crafting I decided to try making my own necklaces.  Now I am obsessed.

It was so fun!  From the bead shopping to the necklace designing I loved creating these.  And like all things I try - super easy!


Using Etsy I purchased a bunch of Czech glass beads - 6mm.  To easily find some options search "craft supplies faceted czech glass beads" or check out some of my favorites on Etsy.  I also purchased some nylon cord used specifically for beading.


The best part was coming up with all the different combinations.  In my opinion you really can't mess this up.  Well its really hard to mess this up.
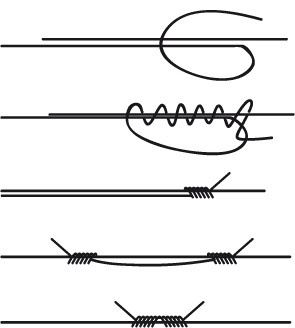
It isn't necessary but I tied knots on each side of my bead series to keep it in place.

Then lastly I used this tutorial to create sliding slip knots so the necklaces could be worn long or short.


My little model loves her jewelry!  I might not get these necklaces back long enough to wear one.


Saturday, August 23, 2014

A Rainy Day Never Looked So Cute

Some of my best summer memories growing up include rainy days.  I grew up on the best street ever filled with some really awesome people and every time it rained we would pile onto one of the porches with snacks and games and hang out until we inevitably found ourselves in the puddles. So when a warm, summer rain passed through today I made sure we got outside to jump in puddles.  That concept was a little lost on Ella (we'll work on it) but she still made a rainy stroll beyond adorable.


Enjoying the rain and then running from it all in a matter of 10 seconds.

So we got an umbrella.


It was pretty heavy.


 But we got the hang of it.


Next up:  Puddle Jumping


Friday, August 22, 2014

Scallop Love and a Baby Hat


(sources below)


I am not trendy so I may be a little behind the times but I am loving all things scalloped.  So much so that I created a baby hat to match the trend.  As you can tell I also love all things black & white and as I see my scallop baby hat alongside all those items I think I'll have to knit one in black & white for Ella this winter.  

Check out the hat in my shop and some really cute photos of Ella rocking it last winter.


Wednesday, August 20, 2014

DIY: Tiles Transformed Into Coasters


I love these easy, cute and personalized coasters.   It's the perfect way to display your favorite Instagram photos in your home or make them for a friend as a housewarming gift.  I've made several sets, most as gifts, but have kept a few for myself.

Our trip to Cali.

 And our trip to Scotland.

They are durable, practical and cheap.  So cheap that you can make a million different sets and keep switching them out.  I have plans to make a few holiday sets either with our own photos or fun illustrations printed from the internet.  I'd love to also include some quotes.  There are no limits in terms of what you transfer onto the coasters.  But first, let me tell you how to transfer the images.  I used this method to also transfer photos to wood.  You can view the tutorial here and see actual step by step photos.

YOU WILL NEED:
- 4x4 photos (printed on standard paper using a laser-jet printer)


I bought basic, white 4x4 tiles from Home Depot.  I then printed 4x4 images on a high-quality laser-jet printer using basic printer paper.  DO NOT use photo paper or card stock and DO NOT use an inkjet printer.  If you don't have access to a laser-jet printer I recommend having your images printed at Kinkos or something.  But remember to use standard printer paper.  Nothing fancy.

Once your photos are cut to size, spread the gel medium generously on the front of the tile.  Really give it a nice thick, complete coat because this is what the image adheres to.  While still wet, place the image right-side down on top of the tile and press down firmly making sure there are no wrinkles or bubbles and the image is completely adhered to the tile.  Let the tile sit for 8 hours or overnight to dry.  Once it is completely dry you can begin to remove the paper with water and a rag.  You will have to really give it a good scrub.  Don't worry you will scrape the image off in some areas....that is because your gel medium was not as thick and so it didn't adhere but I personally love that look.  Especially around the corners.  It takes several coats of rubbing to get all the paper off.   Some fuzz left on is okay too since you will coat the whole tile with mod podge to secure and protect  the image.


Once the mod podge dries your coasters are ready to use!


And in my opinion the best cup to pair with them is a The Mason Bar Company tumbler.
I'm obsessed.


My favorite is the 24oz. tumbler.

I loved it so much I bought a case of 24 oz. mason jars at Target to use as my everyday cups and then bought a few extra wide mouth lids from The Mason Bar Company to pair with them when I'm on the go.

My next purchase is the 12 oz. tumbler.  It is the perfect size for Ella as she gets older and more responsible and I'd love to do the same thing and buy a case of the 12 oz. mason jars to use around the house and a bunch of the regular mouth lids to go with them.  So affordable and fun!


And I was so excited to find these plastic straws at Target the other day to go with them.  They are extra long and fit the 24 oz. jar perfectly.  Plus they were 50% off at my store.


That's how I use my coasters.  Hope you have as much fun using yours!


<a href="http://www.bloglovin.com/blog/12749379/?claim=bg84b6wswf5">Follow my blog with Bloglovin</a>

DIY: Wood Photo Transfers


Like all of you I am completely obsessed with Pinterest.  I would call this a sickness but for all the time I spend on Pinterest, I get just as much out of it.  Countless recipes, DIY ideas and great inspiration for my home, knitting and of course all things baby and maternity.  I really go back to my pins to try things: like this amazing tutorial on how to transfer a photo onto a wood block.

Seriously check this talented lady's video out if you want to make this.  She does a great job explaining it and it is a super cute, quick video.

 Here is how mine turned out.


I had the hardware store cut the boards in 81/2 x 11 pieces and then I sanded them so the corners were soft yet still rustic.


One thing I learned the hard way is that you have to print your photos on a good quality laserjet printer.  Your typical inkjet won't hold the image like it should.  It turns out really blurry and really faded.  It is not a cool effect - trust me.  


Here is a close-up of the mod podge and gel medium needed for this project.

Next I coated my board in gel medium.  Give it a good coat so the entire image holds.  Seriously a nice, thick coat.


Then carefully place your image upside down on the gel.  Make sure there are no bubbles or wrinkles.  Remember that your image will come out reversed so if you don't want that than reverse your image before your print.  Especially if there is lettering.  


After you let the wood block set overnight or 6-8 hrs.  Then gather your materials for removing the paper.  I use water, a rag and gloves.  The gloves are to protect your fingers from excessive scrubbing.  I made a ton of these for family as Christmas presents (they loved them).  However, scraping and rubbing the paper off gave me burns on all my fingers.  I couldn't touch anything for days.  It hurts so bad.  This time I used the rubber gloves and they made all the difference.


Soak the image in water using the rag.  I just dabbed the whole board with water until it was absorbed.  You really cannot ruin the image by using too much water.  The water is your friend.


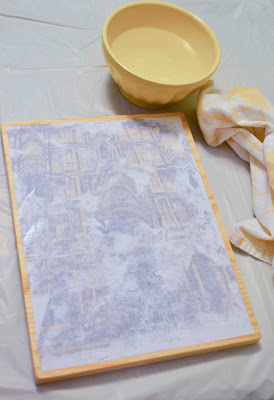
Then rub the paper off and watch your image come to life.  Don't worry you will scrape the image off in some areas....that is because your gel medium was not as thick and so it didn't adhere but I personally love that look.  Especially around the corners.  It takes several coats of rubbing to get all the paper off.   Some fuzz left on is okay too since you will coat the whole board with mod podge to secure and protect  the image.


This is one of my final pieces.  I like how it isn't perfect.  This is a color image which turns out well but black and white and sepia tones are my favorites.  I also do an image on both sides of my board so I can easily swap photos if I get tired of one.  Also, I am toying with the idea of staining the wood around the edges or even whitewashing it or painting it.  We'll see how that turns out.


I haven't hung mine on the wall.  I just rest them on shelves but if you wanted to hang it you could use this cool trick from pinterest for a cheap fix.  Only one image per side though.


Thursday, August 14, 2014

DIY: Fabric Flower Tutorial


Awhile back while blogging over at Cherry Street Cottage I put together a little video on how I make my fabric flowers.  It has been pretty popular so I thought I would share it again here on Little + Lovely because what is more little and lovely than fabric flowers?


I have to give fair warning.  First of all, I have never made a video tutorial nor posted a video on my blog so just keep that in mind.  You will also notice that I get a text at some point in the video, my glue gun breaks and I have a terrible time working my fingers.  You see I was looking through the camera as I made it and whenever I tried looking around the camera I ended up out of focus or even out of the frame.    But overall I think you will get the idea.  So go easy on me......


And if you can't stand my voice (or my video) than here are some photos to try and walk you through it.


Start with a strip of fabric about 2 inches by 18 inches.  The smaller the rosette than the smaller the strip and vice versa.


Then fold the fabric in half.


Then fold it in half again.  How wide this beginning part of your fabric is, dictates how thick your rosette is.  I like my flowers on the thinner side.  Thus the double fold.


Then start rolling it to form a little bud which will be the center of your flower.


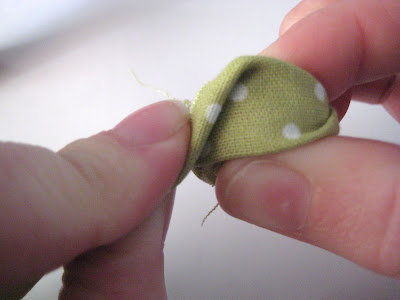
Once the bud is about the size of your fingernail secure it with a little hot glue.  It is important to give your flower a little glue every few folds so it doesn't come unraveled.  First you need to learn how to make these folds though.  This is where the video may be more helpful but let's try it with pictures.


Just keeping folding as you go around and around.  And don't forget to give it some glue every few folds.  
And don't worry about messing up.  You can't go wrong.


There are so many wonderful things you can do with these fabric flowers: headbands, barrettes, pins for clothing and hats….

Pinterest has no shortage of amazing uses.
Related Posts Plugin for WordPress, Blogger...