Like all of you I am completely obsessed with Pinterest. I would call this a sickness but for all the time I spend on Pinterest, I get just as much out of it. Countless recipes, DIY ideas and great inspiration for my home, knitting and of course all things baby and maternity. I really go back to my pins to try things: like this amazing tutorial on how to transfer a photo onto a wood block.
Seriously check this talented lady's video out if you want to make this. She does a great job explaining it and it is a super cute, quick video.
Here is how mine turned out.
I had the hardware store cut the boards in 81/2 x 11 pieces and then I sanded them so the corners were soft yet still rustic.
One thing I learned the hard way is that you have to print your photos on a good quality laserjet printer. Your typical inkjet won't hold the image like it should. It turns out really blurry and really faded. It is not a cool effect - trust me.
Here is a close-up of the mod podge and gel medium needed for this project.
Next I coated my board in gel medium. Give it a good coat so the entire image holds. Seriously a nice, thick coat.
Then carefully place your image upside down on the gel. Make sure there are no bubbles or wrinkles. Remember that your image will come out reversed so if you don't want that than reverse your image before your print. Especially if there is lettering.
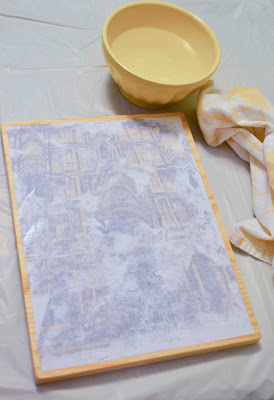
After you let the wood block set overnight or 6-8 hrs. Then gather your materials for removing the paper. I use water, a rag and gloves. The gloves are to protect your fingers from excessive scrubbing. I made a ton of these for family as Christmas presents (they loved them). However, scraping and rubbing the paper off gave me burns on all my fingers. I couldn't touch anything for days. It hurts so bad. This time I used the rubber gloves and they made all the difference.
Soak the image in water using the rag. I just dabbed the whole board with water until it was absorbed. You really cannot ruin the image by using too much water. The water is your friend.
Then rub the paper off and watch your image come to life. Don't worry you will scrape the image off in some areas....that is because your gel medium was not as thick and so it didn't adhere but I personally love that look. Especially around the corners. It takes several coats of rubbing to get all the paper off. Some fuzz left on is okay too since you will coat the whole board with mod podge to secure and protect the image.
This is one of my final pieces. I like how it isn't perfect. This is a color image which turns out well but black and white and sepia tones are my favorites. I also do an image on both sides of my board so I can easily swap photos if I get tired of one. Also, I am toying with the idea of staining the wood around the edges or even whitewashing it or painting it. We'll see how that turns out.
I haven't hung mine on the wall. I just rest them on shelves but if you wanted to hang it you could use this cool trick from pinterest for a cheap fix. Only one image per side though.


No comments:
Post a Comment